Leather flight gear carries more than equipment. It carries years of movement, weather, and personal history. A worn flight jacket may feel durable, yet dry leather can crack around the elbows, cuffs, collar, and pocket edges. Small damage often develops quietly.
So, how to maintain leather flight gear to prevent cracking? The answer begins with regular inspection and gentle cleaning. Examine seams, folds, and high-contact areas after each active season. Remove surface dust with a soft, dry cloth. For deeper marks, use a leather cleaner approved by the manufacturer. Test it on a hidden area first. I learned this step matters after a strong cleaner darkened one sleeve unevenly.
Leather needs controlled moisture, not excessive oil. Apply a suitable conditioner sparingly with a clean cloth. Let it absorb naturally, then remove the residue. Heavy applications can leave the surface greasy and attract dust. Follow the product instructions carefully. Some modern flight gear uses treated leather, so traditional methods may not be suitable.
Dry storage also protects flexibility. Keep the gear on a wide, padded hanger. Avoid direct sunlight, radiators, heaters, and sealed plastic bags. A cool, ventilated closet works better. If the leather becomes wet, blot it gently and let it dry at room temperature. Never force the process with heat. That shortcut can harden the hide.
Care is not complicated. It requires consistency. Manufacturer guidance remains the most reliable reference, especially for lined, insulated, or treated garments. With practical inspection, measured conditioning, and patient storage, leather flight gear can remain supple, functional, and presentable for many years. Mistakes happen, but early attention usually prevents expensive restoration.
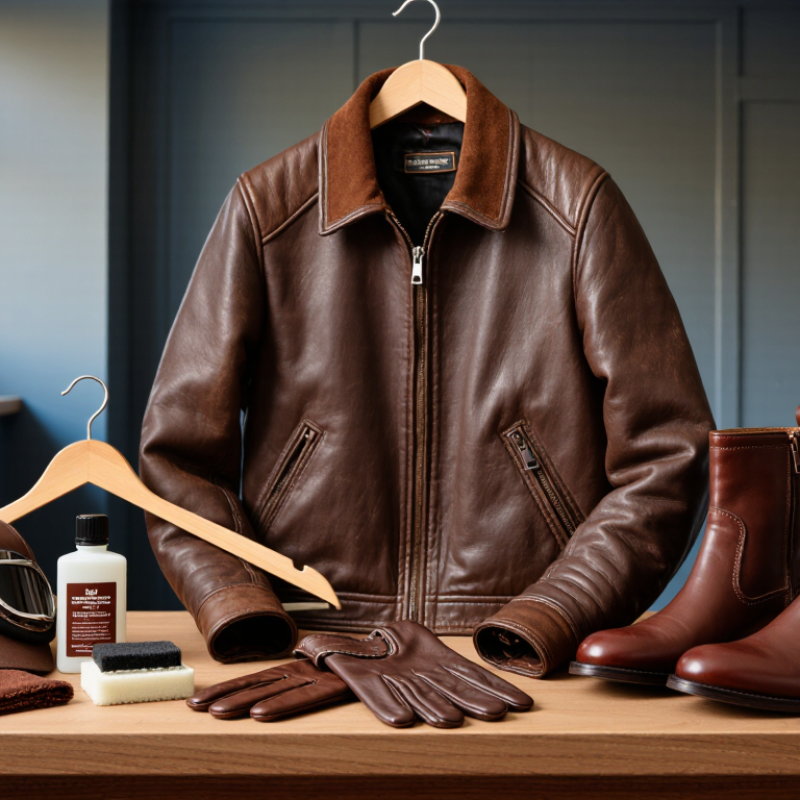
Leather flight gear looks tough, but its surface remains vulnerable to dryness, heat, and repeated flexing. Natural leather contains oils that keep its fibers flexible. Over time, sunlight and warm cockpit air can remove that protection. Cracks rarely appear alone. They often begin around cuffs, elbows, glove fingers, and folded seams.
Moisture creates another problem. Sweat can darken leather and weaken stitching if it remains trapped inside. Rain may leave stiff edges after drying. Wiping the surface with a soft, damp cloth helps remove salt and dust. Let the gear dry naturally, away from heaters. Not too much. Apply a leather conditioner sparingly, because heavy products can clog pores and soften the material excessively.
A careful inspection should include the lining, thread, zippers, and stress points. Small pale lines may indicate early drying, even when the leather still feels smooth. Gently flex those areas and watch for surface splitting. Store jackets on a broad hanger, with gloves kept flat and boots supported upright. Avoid sealed plastic bags, which can trap humidity. I have seen owners condition leather repeatedly, yet ignore damaged seams. That habit needs reconsideration. A product cannot repair fibers that have already broken. When uncertain, seek advice from a qualified leather-care professional before using cleaners, oils, or dyes.
Natural oils slowly disappear through sunlight, warm air, and repeated bending. Cracks often start at cuffs, elbows, glove fingers, and folded seams.
Look for pale lines, dry edges, split surfaces, or loose stitching. Gently flex stress points. Stop if the surface begins separating.
Brush dust away with a soft brush. Wipe salt marks using a barely damp white cotton cloth. Do not soak the leather.
Test a pH-neutral cleaner inside a hidden seam first. Apply diluted cleaner to the cloth, never directly onto the leather. Use small circles around collars, gloves, and stitched panels.
Let it dry naturally at room temperature. Keep it away from heaters, hairdryers, and direct sunlight. Slow drying matters.
Apply only a very thin layer after cleaning and drying. Heavy conditioner can clog pores, attract dust, and soften structural areas. Less is safer.
No. Conditioner cannot rebuild broken fibers or damaged stitching. Inspect thread, zippers, lining, and stress points separately. I used to overcondition gear and ignore seams. That needed reconsideration.
Use a broad hanger for jackets. Keep gloves flat and support boots upright. Avoid sealed plastic bags because trapped humidity can cause problems.
Aim for moderate humidity near 45–55% when practical. A stable room near 23°C is also useful. These are guides, not perfect rules. Check the gear monthly.
Leather flight gear is designed for durability, but regular exposure to sunlight, moisture, sweat, and changing temperatures can cause the material to dry out and crack. How to maintain leather flight gear to prevent cracking? Start by inspecting it regularly for stiffness, faded areas, loose stitching, small splits, or surface dryness. Early attention can prevent minor damage from spreading. Clean the leather gently with a soft, slightly damp cloth to remove dust and residue, avoiding excessive water, harsh detergents, and aggressive scrubbing that may remove its natural oils.
After cleaning, apply a suitable leather conditioner sparingly and allow it to absorb naturally. Conditioning helps restore flexibility and reduce the risk of cracking without leaving the surface overly greasy. Store flight gear in a cool, dry, well-ventilated place away from direct sunlight and artificial heat. Keep items supported in their natural shape, avoid tightly folding them, and ensure they are completely dry before storage. With careful inspection, gentle cleaning, periodic conditioning, and proper storage, leather flight gear can remain comfortable, flexible, and protective for many years.

 Aero Apex